Back to Safety Center Main Menu
Creating a Panic Screen
In Safety Center, setting up a Panic Screen will allow mobile users to quickly access and use a custom shortcut of phone numbers and contacts directly from the home screen. Once the Panic Screen is created through the web portal, you will need to republish the plan so that it is visible for users on the mobile application.
How to Set Up a Panic Screen
- You will first need to access the Plan in which the Panic Screen will be housed. Click on the Plans tab and select My Plans.
- Click View next to the plan you are accessing.
- Click on the Event tab and select Panic Screen Definition.
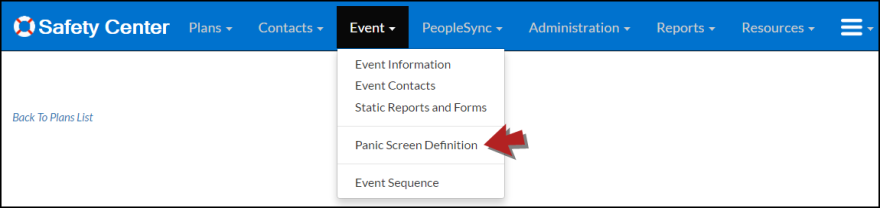
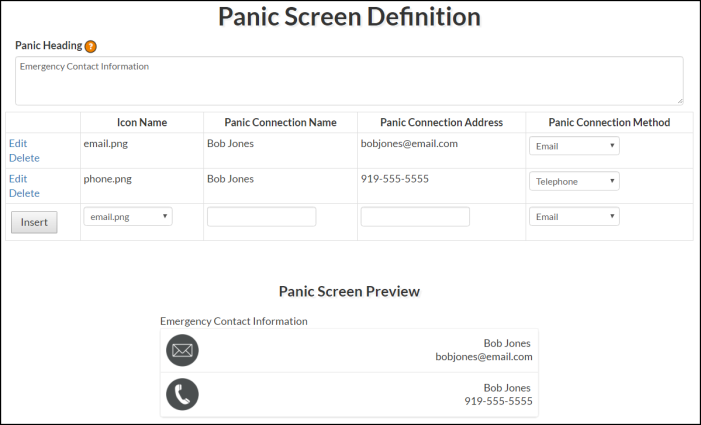
- On the Panic Screen Definition page, enter a Panic Heading that will appear directly above the contact information. *Note: This field is optional.
- Select a png image from the Icon Name drop down that corresponds with the type of contact you are adding. This image will be displayed next to the contact information.
- Enter the name of the contact in the Panic Connection Name field.
- The Panic Connection Address you will enter is dependent upon the form of communication being used. For example: Email, Phone Number, Text Message, or Web Site.
- Once you have determined the form of communication, select that option from the Panic Connection Method drop down.
- Click the Insert button when you are finished. This will show a preview of the panic screen as well as add it to the plan. *Note: You must republish the plan in order for the panic screen to be visible on the mobile app.
Viewing a Panic Event from the Mobile App
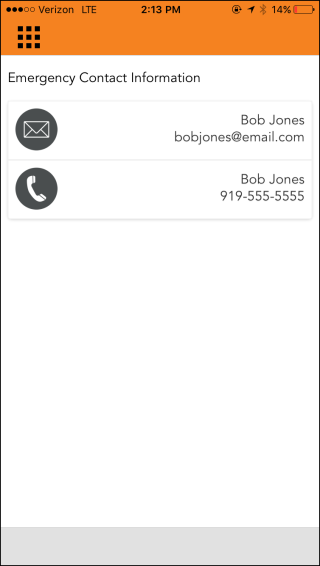
- If there is a Panic Screen listed under a plan, users with access to the plan will see a panic screen icon (
 ) at the bottom of their home screen.
- Tap the panic screen icon () to access the panic screen.
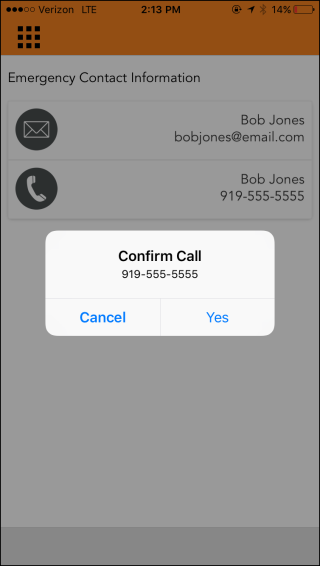
- From this screen, the user can then tap on one of the panic events to perform the corresponding action.

|
|
|
